FEATURED BLOG

Honing your Facilitation Skills: Part 2

Posted by Jo Quinn on Tue, Aug 12, 2014 @ 16:08 PM

By Kevin Stewart

With all the preparation work (Honing your Facilitation Skills: Part 1) behind you, you’re now ready to start facilitating an Apollo Root Cause Analysis. Follow the steps below to ensure a smooth process and successful outcome.

facilitation

  
Step 1. Introductions  

First, do some simple introductions and housekeeping. Cover things like:  

  • Introductions all around
  • The meeting guidelines: when to take breaks, phone and email policy, and so on
  • The objective: we’re here to fix the problem, not appoint blame
  • A review of the Apollo Root Cause Analysis methodology for those who may not be familiar with it (spend 15 – 45 minutes depending on the audience)
  • Your role as facilitator: you may need to ‘direct traffic’ or change the direction of discussions to help them discover more causes or to reach effective solutions

Step 2. Timeline


It’s now time to capture the ‘story’. What has happened that brought you all here? Get several people to provide a narrative, and develop a timeline of events as you go.  

This timeline will prove very useful. It should reveal the event or issue that becomes your primary effect or starting point – and ensures that all the items beyond this starting point capture the group’s issues.    

In the example below, if I start from T1 I’ll discover why I left my iPad in the bathroom.  However if I start at T7 I will also discover why my check process didn’t function as desired.

Date Time Event Comment
  T1 Leave iPad in department restroom stall  
  T2 Meet wife  
  T3 Have lunch  
  T4 Return to car to leave  
  T5 Wife asks if we have everything before we leave  
  T6 Pat pocket and look, run through check list  
  T7 Head home without iPad  
  T8 Get call halfway home asking if i have iPad  

While the time that each event occurs is important, it might not always be known. In these instances, you can represent the time sequence as simply T1, T2 and so on.

Step 3. Define the problem

You’re now ready to define the problem. Often, the problem definition comes out easily and everyone agrees. However, sometimes you’ll find that the group can’t arrive at a Primary Effect. In this case, as facilitator, it’s your job to regroup and ask some questions about why everyone is interested. Often, it’s about money.

One thing you don’t want to do is get stuck trying to find the perfect starting point. I’m reminded of a saying I heard once:

Dear Optimist and Pessimist,

While you were trying to decide if the glass was half empty or half full, I drank it!

Sincerely,

The Realist

The Apollo Root Cause Analysis methodology is robust enough to handle an imperfect starting point. If the problem changes or evolves as you go, just put it down as the new starting point, adjust the chart and go on!

Now that you have a defined problem, with its significance well understood, you’re now ready to start the charting process. The team should also know by now why they’re here, and how much time and money can be spent on the investigation. 

If you missed Part 1 of this article, you can read it here.

Would you like to learn more about the Apollo Root Cause Analysis methodology? Our 2 Day Root Cause Analysis Facilitators course is perfect for anyone needing to understand fundamental problem solving processes and how to facilitate an effective investigation.

Topics: root cause analysis, rca facilitator, rca skills, root cause analysis skills, rca facilitation, root cause investigation, facilitation skills, root cause analysis program, root cause facilitation, rca facilitators, root cause analysis reporting

3 Simple RCA Facilitation Tips

Posted by Melanie Bennett on Thu, Nov 28, 2013 @ 08:11 AM

By Ned Callahan

“How long should an RCA take?”

This question is similar to how long is a piece of string?

I have heard one manager in a plant that hasproblem analysis stipulated a maximum of two hours for an RCA to be conducted in his organisation. Another expects at least “brainstormed” solutions before the conclusion of day one – within 6 or 7 hours.  It is not uncommon for a draft report to be required within 48 hours of the RCA.

The following three tips may assist to meet tight deadlines and when time expectations are short. One advantage of the Apollo Root Cause Analysis method is that it is a fast process but the “driver” has to be on the ball to achieve the desired outcomes – effective solutions.


  1. YOU DEFINE THE PROBLEM

Imagine the RCA has been triggered by an unplanned incident or event which falls into any of the safety, environment, production, quality, equipment failure or similar categories. You have been appointed as the facilitator by a superior/manager who is responding to the particular event. Your superior/manager may understand the trigger mechanism and may well nominate the problem title.

For example, “upper arm laceration”, “ammonia spill”, “production delay” and so forth could be the offering you make to the team as the starting point for the analysis. Typically, as facilitator you will have gathered some of the “facts” from first responder reports, interviews, data sheets, photographs and so on.  So a good first step is to draft a problem definition statement, including the significance reflected by the consequences or impacts. The team then has a starting point to commence the analysis, albeit the problem statement may change as more detail is provided.

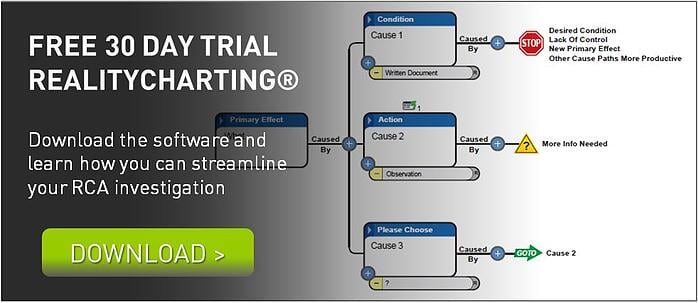
Ideally, you will have already created a file in RealityCharting™ and the Problem Definition table can be projected onto a screen or even onto the clear wall where your charting will be done with the Post-It™ notes. The team members’ information ought to have been entered and can be confirmed quickly in this display. You might even show the Incident Report format and focus on the disclaimer option you have selected deliberately: Purpose: To prevent recurrence, not place blame.

This preparatory work could save at least 20 minutes of the team members’ time and enable an immediate launch into the analysis phase.

NB
Save yourself hours of re-work and potential embarrassment by saving the file as soon as this first process is complete, if you haven’t already done so, and thereafter on a regular basis. Maintain some form of version control so that the evolution of the chart in the following day/s can be tracked if necessary.

If you are particularly well-resourced the chart development might be recorded on the software simultaneously as the hard copy is created on the wall space. A small team might choose to create the chart directly via the software and a decent projection medium.


2.    DIRECT THE ANALYSIS

It is critical that your initiative in preparing the problem definition is not considered by the team members as disenfranchising them. The analysis step whereby all have an opportunity to contribute should ensure that they feel they have “ownership” of the problem.

To reinforce this, it is advisable to choose a sequence of addressing each member, typically from left to right or vice-versa depending on the seating arrangements. This establishes the requirement that one person is speaking at a time, secondly, that each and every statement will be documented and thirdly, that every person has equal opportunity. Your prompt and verbatim recording of each piece of information will provide the discipline required to minimise idle chatter which can waste time because it distracts focus. When you have a series of “pass” comments from team members because the process has exhausted their immediate knowledge of events, launch the chart creation. 

It is worthwhile reminding the team that each information item that has been recorded and posted in the parking area, may not appear in their original form on the chart or at all, in some cases. Because the information gathering is a widespread net to capture as much knowledge regarding what happened, when and why, there will be no particular focus. But because they are coming from people with experience and expertise or initimate knowledge of events and
circumstances, they have some value. The precise value will be determined by where the information sits in the cause and effect logic that starts at the problem and is connected by “caused by” relationships. 

NB. Cause text should be written in CAPITAL LETTERS. It will be easier to read/decipher for the team at the time and perhaps from photographs of the chart later. Similarly using caps in the software itself means that projection of the chart is more effective and the printing of various views is enhanced.


3.    THE “HOW AND IF”  OF  CREATING A REALITYCHART™

Many proponents tap the existing understanding of the event by capturing as many of the action causes as possible. These may arrive via a 5 WHYS process, for example, which starts at the Primary Effect.

            Plant Stopped (Problem or Primary Effect)

            Why? Feed pump not pumping

            Why? Broken Coupling

            Why? Motor Bearing Seized

            Why? Bearing race Collapsed

            Why? Fatigue

The Apollo Root Cause Analysis methodology requires use of the expression “caused by?” to connect cause and effect relationships. Understanding that there must be at least one action and one condition helps  reveal the “hidden” causes and especially the condition causes which do not come to mind initially.

To support this expression and the essential “why”, consider asking “how”. This may be  employed initially by the most impartial member of your team who has been engaged specifically because of his/her lack of association with the problem and can sincerely ask the
supposedly “dumb” questions. Invariably these questions generate more causes or a more precise arrangement of the existing causes. A “How does that happen exactly?” question can drive the team to take the requisite “baby steps”.  This also often exposes differences between “experts” and the resolution of these differences is always illuminating.

The facilitator needs to be aware of the need to softly “challenge” the team’s understanding while ensuring the application of sufficient rigour to generate the best representation of causal relationships. This can be done in a neutral manner by using the “IF” proposition.

Given that every effect requires at least two causes, you can then address the team with the proposition: “If ‘one exists’ and ‘three exists’ (two conditions) then with ‘four added’ (the action) will the effect be “eight” every time?”. Using this technique on each causal element will generate the clarity and certainty being sought to understand the causes of the problem. If every “equation” (causal element) in the chart is “real” and the causes themselves are “real”
(substantiated by evidence) then the team is well-placed to consider the types of controls it could implement to prevent recurrence of the problem.

The more causes which are revealed the more opportunities the team has to identify possible solutions.


SUMMARY

To speed up the RCA process,

Step 1 Facilitator gathers event information and fills out Problem Definition Statement.

Step 2 Facilitator directs the Information gathering casting a wide net and systematically requests information from participants.

Step 3 Use information gathered to build a RealityChart™ with actions based on what happened then looking for other causes such as conditions which may initially be hidden. Use how and If to help validate that causal relationships are logical.

With a completed chart the solution finding step can begin.


RCA DISCUSSION

What are your thoughts on conducting an RCA facilitation and how much time have you spent preparing the analysis?  Do you have a successful tip worth sharing or discussing? We look forward to reading your feedback and perspective via comments below or let’s connect on our LinkedIn Group – ARMS Reliability - Apollo Root Cause Analysis for further discussion.

training footer ad resized 600


Topics: root cause analysis, rca facilitator, rca facilitation, root cause investigation, root cause facilitation, rca facilitators, 5 Whys

Root Cause Analysis - What's in a name?

Posted by Jessica Peel on Fri, May 24, 2013 @ 14:05 PM

By Jack Jager RCA what's in a name

Giving the right name to your problem – in other words, defining it clearly – is the first step towards fixing it.

The naming of a problem before you actually start investigating it is a critical first step. It gives the investigation a clear purpose, a clear starting point and a clear direction.

Think about it. If you can’t define your problem clearly, then how do you know if the solutions proposed in the investigation will actually prevent its reoccurrence? How will you know if you have achieved what you set out to do?

Not only that, but a clearly defined problem is essential for when you present your initial report on the investigation. You need a strong name for the problem to catch the reader’s attention and make it very clear what the report is setting out to solve. You need management to buy-in into your problem to secure the time and resources needed to conduct a more comprehensive analysis. A strong title is always the first step.

What makes a good name?

The name of the problem needs to be short and concise. It should have impact. It should avoid the use of generic or ambiguous language.

For example, a “Failed bearing” is generic in its description. The title is vague – I know I have a problem with the bearing, but I don’t really know what sort of problem it is. A generic heading opens the door to many different possibilities. If you ask yourself why you have a “failed” bearing, many new questions and options arise resulting from the many different failure modes that are possible. This is not really what you want.

Rather, you should convey the understanding that the particular failure of the bearing is a unique, single incident in its own right. It has specific causes. And it needs a specific name.

Root cause analysis vs failure modes effects analysis

What are you trying to do with your investigation? Are you performing a “failure modes effects” analysis, or a “root cause analysis” on a very specific issue? If it is the latter, then the language you use needs to reflect this. It needs to be specific.

If the problem’s causes are unknown when you first start an investigation, then an understanding of all possible failure modes has some merit. It’s a good place to start, as it will help to point you in the right direction. However, keep in mind that it’s a starting point only. Once you have found the evidence to determine which cause path needs to be pursued, your investigation should become very specific, with all alternative pathways eliminated.

Think about a generic problem title: “person injured”. To make it more specific, we ask “What is the injury?” The response tells us that the person received “second degree burns to left forearm”. This more specific title immediately conveys how serious the problem is, and also generates far more specific questions in the analysis of the incident. In turn, this leads to more precise responses and a better understanding of the issue.

Streamlining your cause and effect chart

A more specific and clear problem name will also make your cause and effect chart more specific. It will become more streamlined, with fewer possible cause path options and “OR” scenarios.

Going back to the earlier example, if you say that the problem is a “Failed bearing”, you will likely get responses like “That’s normal. It happens all the time.”

But if you call the problem: “Conveyor offline” (because of a failed bearing) then what sort of response do you get?

Or if you were to describe the problem as: “Can’t load the train” (because the conveyor is offline) what reaction would you get? Again, the response is likely to be ramped up even further.

The fundamental problem – a failed bearing – is still the same. The three ways to name the problem show how the events are connected, yet sit in different positions on the time continuum. Each is a possible starting point, but which one will give you the biggest buy-in factor?

You may want to choose the most significant event as your starting point, as this will surely obtain greater buy-in.

If unsure of where to start, try using a “so what” question to guide you – “So what if the bearing fails? What’s the impact?”

This may tell you: “Conveyor is stopped.” So what?  What’s the impact of the conveyor stopping?

“Cant load the train.”

In this scenario, this last issue – an inability to load the train – is arguably the best starting point as it will gain far more buy-in from people further up the chain of command, and hence be more likely to secure funding and resources.

All because of a name

When choosing an appropriate starting point for your investigation, consider your options carefully and then assign a name that will clearly articulate the problem you intend to solve – one that also echoes the significance of the problem itself.

Further food for thought

Remember:  You are never wrong when choosing a starting point as all causes are related. They are simply at different points in the timeline. Your choice may reflect your role or responsibility within the company.

describe the image

Topics: rca facilitator, rca skills, root cause analysis skills, root cause investigation, rca facilitators

5 Critical skills for RCA facilitators

Posted by Apollo Root Cause Analysis on Mon, Mar 25, 2013 @ 11:03 AM

skills

By Jack Jager

If you are investigating an incident using Root Cause Analysis (RCA), what are the critical skills that you should possess as an RCA facilitator?

Here are five key skills that will help to make you a more effective facilitator.

1. Value all ideas equally

First of all, it is important to acknowledge all ideas – nothing is unimportant. Something that seems trivial now may hold a great deal of value later in the process. Discourage any negative feedback from the group. This, too, is a disincentive to proffer suggestions or ideas.

The goal of information gathering is to capture everything known about a problem, no matter where it fits into cause and effect relationships. Just by watching you write a comment on a yellow “stickie” or type into the holding area, the participants can see that you are acknowledging what they know. Later, if it fits in the cause and effect chart then it has value; if it doesn’t, then it will naturally fall off the chart.

Secondly, value each and every response, regardless of where it comes from. First and foremost, this will encourage a positive flow of information from participants. If the facilitator starts saying “No, that’s not right”, then people may think before speaking and slow the whole process down. They may even stop contributing to the discussion, censoring the information in their own minds and preventing it from being evaluated on its own merits. Similarly, if someone offers a suggestion which is ignored then participants can switch off – you have to be able to work rapidly or say, “Hold that thought while I finish writing this one”.

So remember … no put-downs allowed, from you or any other member of the group. Positive affirmation is the mode for the facilitator to get a productive session.


2. Be dynamic

As facilitator, you need to guide the direction of the group and yet still be alert for other cause paths that may crop up. You are the prime mover, controlling the focus of the group. Don’t be a bystander to the process. You are the conduit through which the group is interacting.

Ask questions that are as precise as possible. This will elicit better, more concise responses which make it easier to identify causes. Good questioning will also eliminate unnecessary discussion and storytelling from the group.

Once the information has been recorded, get the group to help you organise the information and then challenge the logic of the way that information is linked together. Your cause and effect chart needs to make sense – or it risks being challenged and disregarded by those who look at it.

Remember … being dynamic may not come easy or naturally, but it’s important to give it a go. In this mode, you should continually ask “why” questions.


3. Keep the analysis moving

Don’t let the investigation get bogged down in detail too soon. Get the first pass of the chart out and then refine it. If the first pass is a linear connection of causes, then so be it. Remember, this is the start of the cause and effect chart, not the finish.

A timeline is often a good place to start – ordering key events according to “when” they happened. Such a timeline does not address the question of “why”, but it could certainly initiate a more comprehensive search for causes.

Do not waste time at this point trying to judge or evaluate each cause. Simply ask “why” immediately after placing the cause on the chart to keep people focused and moving down a productive path.

Try not to allow individuals to dominate the analysis. Everyone is there for a purpose, and has information to contribute to the investigation. Ensure that all people have the opportunity to speak. Keep redirecting and asking for other inputs. If one group member is dominant, set some ground rules – try giving each participant a chance to say what they know in turn, working your way around the group.

Remember … adding the finer detail can happen later, but then the devil is always in the detail. The onus is therefore still on you to do this.


4. Be a good listener

Attentive listening skills are critical. You need to be able to hear more than one response at a time. Your ears should be like radar, picking up on all signals. Don’t miss a response while recording another. You need to record everything.

Being a good listener means keeping an open mind, suspending judgment, and maintaining a positive bias.

It also requires the efforts of the whole group – ask the group not to have discussions on the side, as they might come up with causes that should be included but may not be shared with the group. This will also help you to hear all responses more clearly.

Remember … delegating the recording of information could be useful if it will help you to listen more effectively.


5. Don’t profess to be an expert

Don’t profess to be the expert about the problem at hand. You were appointed to be the facilitator, an independent guide, without a vested interest in the outcome. Ask the others in the group to explain what they know so that everyone can follow and understand it. That is why they are there. Remember … you don’t hold all the answers. That isn’t why you are the facilitator or it shouldn’t be. A good facilitator plays dumb whilst still directing traffic and working the cause and effects paths to a reasonable stop point.


Conclusion

Every incident comes with its own challenges. Each time you facilitate, you will no doubt come up against a range of human behaviours, which you will have to manage.

It’s a great idea to debrief the process and your role in it with some of the people involved. They will no doubt provide valuable feedback that will help you improve.

Finally, have faith in the RCA process, and learn from each experience to build on your skills as a facilitator.

Read about the key steps in preparing for RCA success.

training footer ad resized 600


Topics: rca skills, root cause analysis skills, rca facilitation, root cause investigation, critical rca skills, root cause facilitation, rca facilitators